Installation Instructions for HDCC-01
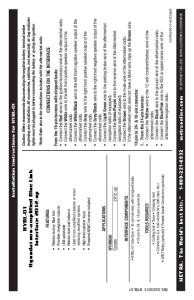
HDCC-01 Honda clock retention 2012-2014 Features • • • • • • • • •
Provides accessory power (12-volt 10-amp) Used in amplified and non-amplified systems Provides NAV outputs (parking brake, reverse, and V.S.S.) ASWC-1 harness included (ASWC-1 sold separately) High level speaker input Retains balance and fade Retains ability to change the factory clock Retains factory 3.5 AUX jack Micro “B” USB updatable
REV. 6/12/2015 INSTHDCC-01
Interface Components • HDCC-01 interface • HDCC-01 harness • 8-pin subwoofer harness • 16-pin harness with stripped leads
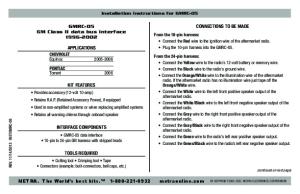
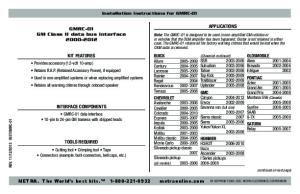
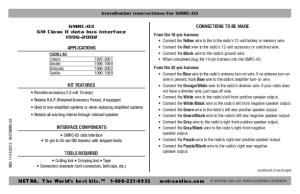
APPLICATIONS Honda Civic CR-V
2012-2013 2012-2014
Tools Required • Cutting tool • Tape • Crimping tool • Connectors (i.e. butt-connectors, bell caps, etc.)
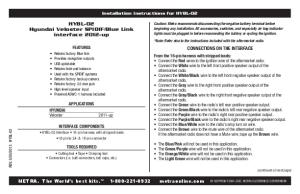
Caution: Metra recommends disconnecting the negative battery terminal before beginning any installation. All accessories, switches, and especially air bag indicator lights must be plugged in before reconnecting the battery or cycling the ignition. *Note: Refer also to the instructions included with the aftermarket radio.
Connections to be made From the 16-pin harness with stripped leads to the aftermarket radio: • Connect the (2) Red wires to the accessory wire. • Connect the Orange/White wire to the illumination wire. If the aftermarket radio does not have an illumination wire, tape it off and disregard it. • Tape off and disregard the Gray, Gray/Black, Green, Green/Black, and Brown wires, they will not be used in this application. The following wires are for the aftermarket radios that have navigation built in: • Connect the Light Green wire to the parking brake wire (if applicable). • Connect the Blue/Pink wire to the VSS or speed sense wire (if applicable). • Connect the Green/Purple wire to the reverse wire (if applicable). From the HDCC-01 harness to the aftermarket radio: • Connect the Black wire to the ground wire. • Connect the Yellow wire to the battery wire. • Connect the Blue/White wire to amp turn-on wire. • Connect the White/Red RCA to the audio AUX in of the aftermarket radio (if equipped). (continued on next page)
METRA. The World’s best kits.™ 1-800-221-0932
metraonline.com
© COPYRIGHT 2004-2015 METRA ELECTRONICS CORPORATION
HDCC-01 For the following (8) wires, if the vehicle does not have a factory amplifier, cut off the RCA jacks to expose the speaker wires and use those instead. • Connect the White wire to the left front positive speaker output. • Connect the White/Black wire to the left front negative speaker output. • Connect the Gray wire to the right front positive speaker output. • Connect the Gray/Black wire to the right front negative speaker output. • Connect the Green wire to the left rear positive speaker output. • Connect the Green/Black wire to the left rear negative speaker output. • Connect the Purple wire to the right rear positive speaker output. • Connect the Purple/Black wire to the right rear negative speaker output.
REV. 6/12/2015 INSTHDCC-01
From the 8-pin subwoofer harness to the aftermarket radio (amplified models only): • Connect the White RCA to the subwoofer output. 12-pin pre-wired ASWC-1 harness: This harness is to be used along with the optional ASWC-1 (not included) to retain steering wheel audio controls. If the ASWC-1 is not being used, disregard this harness. If it will be used, please refer to the ASWC-1 instructions for radio connections and programming. Note: Disregard the harness that comes with the ASWC-1.
Installing the HDCC-01 With the key in the off position: • Connect the 16-pin harness with stripped leads into the interface. • Connect the HDCC-01 harness into the interface, and then into the vehicle. • With all connections completed, reconnect the negative battery terminal. Note: If using the ASWC-1, connect it after you initialize and test the HDCC-01, with the key in the off position.
METRA. The World’s best kits.™
1-800-221-0932
Initializing the HDCC-01 Attention: If the HDCC-01 loses power for any reason, the following step will need to be performed again. • Initialize the interface by turning the ignition on for 30 seconds, then turn the ignition back off, then back on again.
Extra features Setting the factory clock: • Press and hold the SOURCE button on the steering wheel for 15 seconds to get into the clock setting mode. • Press SEEK-UP or SEEK-DOWN to select hours, minutes, etc. Press VOLUME-UP or VOLUME-DOWN to set the values. • Either press SOURCE again, or wait 5 seconds with no activity to exit the clock setting mode.
IMPORTANT WARNING This product includes instructions for installation which must be carefully followed. The instructions are worded in such a manner to assume that the installer is capable of completing these type of electronic installations. If you are unclear as to what you are instructed to do or believe that you do not understand the instructions so as to properly and safely complete the installation you should consult a technician who does have this knowledge and understanding. Failure to follow these instructions carefully and to install the interface as described could cause harm to the vehicle or to safety systems on the vehicle. Interference with certain safety systems could cause harm to persons as well. If you have any questions in this regard please call the Help line or Metra at 1-800-221-0932 for assistance. KNOWLEDGE IS POWER Enhance your installation and fabrication skills by enrolling in the most recognized and respected mobile electronics school in our industry. Log onto www.installerinstitute.com or call 800-354-6782 for more information and take steps toward a better tomorrow.
metraonline.com
Metra recommends MECP certified technicians
© COPYRIGHT 2004-2015 METRA ELECTRONICS CORPORATION
Instrucciones de instalación para HDCC-01
HDCC-01 Honda retención de reloj 2012-2014
Características • • • • • • • • •
Provee corriente de accesorios (12 voltios 10 amperes) Se usa en sistemas amplificados y no amplificados Proporciona salidas de NAV (freno de mano, reversa y V.S.S.) Arnés ASWC-1 incluido (el ASWC-1 se vende por separado) Entrada de bocina de alto nivel Retiene el balance y la intensidad Retiene la capacidad de cambiar el reloj de fábrica Retiene el conector AUX 3.5 de fábrica Actualizable por micro “B” USB
REV. 6/12/2015 INSTHDCC-01
Componentes de la interfase • Interfase HDCC-01 • Arnés HDCC-01 • Arnés de subwoofer de 8 pins • Arnés de 16 pins con conectores pelados
APLICACIONES Honda Civic CR-V
2012-2013 2012-2014
Herramientas requeridas • Cortador • Cinta • Pelacables • Conectores (ejemplo: conectores de extremo, de campana, etc.)
PRECAUCIÓN: Metra recomienda desconectar el terminal negativo de la batería antes de comenzar cualquier instalación. Todos los accesorios, interruptores y, especialmente, las luces indicadoras de airbag deben estar enchufados antes de volver a conectar la batería o comenzar el ciclo de ignición. *Nota: Remítase a las instrucciones incluidas con el radio de postventa.
Conexiones que se deben hacer Del arnés de 16 pins con conectores pelados al radio de mercado secundario: • Conecte los (2) cables rojos al cable de accesorios. • Conecte el cable anaranjado/blanco con el cable de iluminación. Si el radio de mercado secundario no tiene un cable de iluminación, encíntelo e ignórelo. • Encinte e ignore el cable gris, gris/negro, verde, verde/negro y café, ya que no se utilizarán en esta aplicación. Los siguientes cables son para radios de mercado secundario que tienen navegación integrada: • Conecte el cable verde claro al freno de mano (si aplica). • Conecte el cable azul/rosa al VSS o al cable del sensor de velocidad (si aplica). • Conecte el cable verde/púrpura al cable de reversa (si aplica). Del arnés HDCC-01 al radio de mercado secundario: • Conecte el cable negro al cable de tierra. • Conecte el cable amarillo al cable de la batería. • Conecte el cable azul/blanco con el encendido del amplificador. • Conecte el conector RCA blanco/rojo a la entrada AUX de audio del radio de mercado secundario (si incluye el equipamiento). (continúa en la página siguiente)
METRA. The World’s best kits.™ 1-800-221-0932
metraonline.com
© COPYRIGHT 2004-2015 METRA ELECTRONICS CORPORATION
HDCC-01 Para los siguientes (8) cables, si el vehículo no tiene un amplificador de fábrica, corte los conectores RCA para exponer los cables de las bocinas y utilizar dichos cables en su lugar. • Conecte el cable blanco con la salida positiva de la bocina frontal izquierda. • Conecte el cable blanco/negro con la salida negativa de la bocina frontal izquierda. • Conecte el cable gris con la salida positiva de la bocina frontal derecha. • Conecte el cable gris/negro con la salida negativa de la bocina frontal derecha. • Conecte el cable verde con la salida positiva de la bocina izquierda trasera. • Conecte el cable verde/negro con la salida negativa de la bocina izquierda trasera. • Conecte el cable púrpura con la salida positiva de la bocina derecha trasera. • Conecte el cable púrpura/negro con la salida negativa de la bocina derecha trasera.
REV. 6/12/2015 INSTHDCC-01
Desde el arnés de subwoofer de 8 pins al radio de mercado secundario (únicamente modelos amplificados): • Conecte el conector RCA blanco a la salida del subwoofer. Arnés ASWC-1 precableado de 12 pins: Este arnés se debe usar junto con el ASWC-1 opcional (no incluido) para retener los controles de audio en el volante. Si no se usará el ASWC-1, ignore este arnés. Si se va a utilizar, consulte las instrucciones de ASWC-1 para las conexiones del radio y la programación. Nota: Ignore el arnés que viene con el ASWC-1.
Instalación del HDCC-01 Con la llave en la posición de apagado: • Conecte el arnés de 16 pins con conectores pelados a la interfase. • Conecte el arnés HDCC-01 a la interfase y luego al vehículo. • Cuando todas las conexiones estén hechas, vuelva a conectar la terminal negativa de la batería. Nota: Si va a utilizar el ASWC-1, conéctelo después de inicializar y probar el HDCC-01 con la llave en la posición de apagado.
METRA. The World’s best kits.™
1-800-221-0932
Inicialización del HDCC-01 Atención: Si el HDCC-01 pierde la alimentación por cualquier motivo, deberá realizar el siguiente paso de nuevo. • Para inicializar la interfase, encienda la marcha y espere 30 segundos, luego vuelva a apagar la ignición, y enciéndala una vez más.
Características adicionales Configuración del reloj de fábrica: • Presione sin soltar el botón SOURCE (fuente) del volante durante 15 segundos para entrar al modo de configuración del reloj. • Presione SEEK-UP (buscar anterior) o SEEK-DOWN (buscar siguiente) para seleccionar las horas, los minutos, etc. Presione VOLUME-UP (subir volumen) o VOLUME-DOWN (bajar volumen) para configurar los valores. • Vuelva a presionar SOURCE (fuente) o espere 5 segundos sin actividad para salir del modo de configuración del reloj.
ADVERTENCIA IMPORTANTE Este producto incluye instrucciones de instalación que deben seguirse cuidadosamente. Dichas instrucciones están redactadas dando por supuesto que el instalador es capaz de completar estos tipos de instalaciones electrónicas. Si tiene dudas respecto de lo que se le indica que haga o cree que no comprende las instrucciones como para completar la instalación en forma adecuada y segura, debe consultar a un técnico que efectivamente tenga estos conocimientos y comprensión. Si no sigue estas instrucciones con cuidado y no instala la interfaz como se describe, podría provocar daños en el vehículo o en los sistemas de seguridad del vehículo. La interferencia con determinados sistemas de seguridad también podría provocar daños a las personas. Si tiene alguna pregunta al respecto, llame a la línea de ayuda o a metra, al 1-800-221-0932 para obtener asistencia. EL CONOCIMIENTO ES PODER
KMejore NOWLEDGE ISinstalación POWER sus habilidades de y fabricación
Enhance your installation and fabrication skills by enrolling in the most inscribiéndose enrecognized la escuelaand derespected dispositivos electrónicos mobile electronics school in our industry. de nuestra móviles más reconocida y respetada Log onto www.installerinstitute.com or call industria. Regístrese en www.installerinstitute.com o 800-354-6782 for more information and take steps toward tomorrow. para obtener más información y llameaalbetter 800-354-6782
Metra recomienda técnicos con certificación del Programa de Certificación en Electrónica Móvil (Mobile Electronics Certification Program, MECP).
avance hacia un futuro mejor.
metraonline.com
© COPYRIGHT 2004-2015 METRA ELECTRONICS CORPORATION